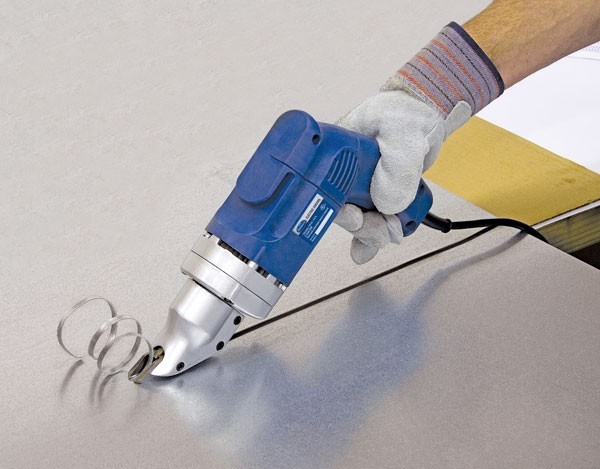
Cutting with Sheet Metal Snips Cutting with an Electrical Metal Shear
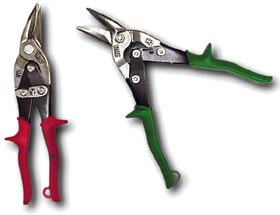
First off, I began by learning and getting the gist of cutting sheet metal
Question: What did you attempt to cut?

Kelly: Well first I tried to cut out flower petal and leaf-like shapes.
Question: What else did you learn to do?


Kelly: I learn about the process called enameling where you add enamel to any piece of metal, heat up the bottom of the metal with a high temperature torch until it turns a bright orange and it turns into glass. So I did this with a piece of copper and put green enamel in the indents of the metal that I made with a chisel and hammer.
Question: Wow! That's cool. So what did you end up using that for your holiday project?

Kelly: It turned out that the metal was too thick to make my project. So instead I used cut out and
flattened aluminum cans since it will be easier to cut.
Question: And what did you make?

Kelly: So I brainstormed and thought it would be really cool to make a flower. I thought about cutting out petals but then thought that putting them together would waste time. So instead, I drew out asymmetrical oval like shapes connecting.
Question: So then what did you do?

Kelly: So I then cut out and began rolling it. And it turned out to look like a rose.
Question: Was that the finish product?

Kelly: Oh of course not. I wanted to make it look as close to a flower as possible. I used some excess metal from the Metal Shear used to cut sheet metal and used it as my stem for my flower. But I still wasn't done there.
Question: What else did you add?

Kelly: I wanted to make it stand and so that's what I did. I cut a few pieces of the curled metal and used and the stand to support the flower.
Question: Did it fall over?


Kelly: It wasn't necessarily that it fell over. But there was no weight holding the flower down that just using your finger would push it down. So I found a cylindrical bar of steel and cut four equal pieces. I then attached it to the legs of the flower it worked out pretty well.
*Close up of the bottom of the flower stand*

Yes I used a hot glue gun to put everything together. Bear with me. I'm still a bit new at this and trying epoxy was a bit challenging to maintain the stand still for only a few minutes left of the class.
Question: And did you leave the flower the way it was?


Kelly: No I didn't really like seeing the words of the soda can. So I then decided to paint the outside and inside of the flower blue with a spongy brush.
Question: Wow that looks awesome! Did you have any extra materials?

Kelly: Yes I had a lot of extra aluminum and used it to my advantage. I cut out and painted some leaves to attach to the stem.
Here's how the whole thing turned out!


This comment has been removed by the author.
ReplyDeleteI like it your sheet metal and automobile post.really very interesting and useful information.thanks for share this post.we provide high quality automobile parts and sheet metal,in low cost.please have a look over here.
ReplyDeletemulti purpose fire extinguisher
Great post. I used to be checking constantly this weblog and I'm impressed! Extremely useful information specially the closing part :) I maintain such information much. I was once seeking this specific information for a lengthy time. Thanks and best of luck. my sites:sheet metal essex
ReplyDeleteSuch a nice blog it is. Keep sharing
ReplyDeleteThank you!
aluminium roofing sheets